서버 쪽에 관련해서 자원을 관리하는 입장이라면 보안적 요소는 필수이다.
If we are in a position to manage resources in relation to the server side, a security factor is essential.
서버의 안전한 관리를 위해 같이 AWS 2단계 보안을 설정하는 방법을 알아보도록 하자.
Let's see how to set up AWS two-step security together for secure management of our servers.
첫 번째 방법은 타 사이트와의 비밀번호를 다르게 하는 것이다.
The first way is to set a different password than other sites.
아마 컴퓨터를 사용하시는 분들 중 많은 분들이 다양한 사이트에 아이디와 비밀번호를 같게
설정하는 경우가 많을 거라고 생각이 든다.
Probably, I think that many of the people who use computers often set the same ID and
password for various sites.
가입된 하나의 사이트라도 계정과 비밀번호를 크래킹 당하게 된다면 아마존 웹 서버의
계정과 비밀번호도 크래킹당할 확률이 높다.
If an account and password are cracked for even one registered site,
there is a high probability that the account and password of the Amazon web server will also be cracked.
이러한 경우를 대비해 비밀번호를 타 사이트들과 다르게 설정하는 것을 추천한다.
it is recommended to set the password differently from other sites.
기억하기 힘들다면 컴퓨터 내부에 비밀번호를 기록해놓지 말고 수첩에 적어놓도록 하자.
If it's hard to remember, don't write your password inside your computer, but write it down in a note.
컴퓨터도 100% 안전하다고 보긴 힘들기 때문이다.
It is difficult to say that computers are also 100% safe.
두 번째 방법은 2단계 인증을 설정하는 것이다.
The second way is to set up 2-step authentication.
2단계 인증은 아마존 웹 서비스 사이트에서 설정가능하니 같이 알아보도록 하자.
2-step authentication can be configured on the Amazon web service site, so let's look at it together.
먼저 AWS 사이트에 접속한 후 로그인을 진행할 예정인데 로그인은 루트 사용자로 해야 한다.
루트 사용자는 최고 권한을 갖는 사용자를 의미한다.
First, we must log in to the AWS site as the root user.
The root user means a user with the highest authority.
① 루트 사용자를 선택한다.
① Select the root user.
② 가입할 때 등록했던 이메일을 입력한다.
② Enter the email you registered when creating your account.
③ [다음]을 선택한 후 다음 페이지로 넘어간다.
③ Select [Next] and move to the next page.

비밀번호까지 입력하고 나면 로그인이 완료된다.
After entering the password, login is complete.
① 로그인이 완료된 상태에서 자신의 아이디를 클릭한다.
① Click your ID when login is complete.
② 클릭한 후 메뉴에서 [내 보안 자격 증명]을 클릭한다.
② After clicking, click [My Security Credentials] on the menu.

필자는 OTP로 2차 인증을 설정하는 방법을 설명하려고 한다.
I am going to explain how to set up secondary authentication with OTP.
① [멀티 팩터 인증(MFA)] 항목을 클릭한다.
① Click [Multi Factor Authentication (MFA)].
② [MFA 활성화] 버튼을 클릭한다.
② Click the [Activate MFA] button.

① [가상 WFA 디바이스] 옵션을 선택한다.
① Select the [Virtual WFA device].
② [계속] 버튼을 눌러 다음 단계로 넘어간다.
② Click the [Continue] button to go to the next step.

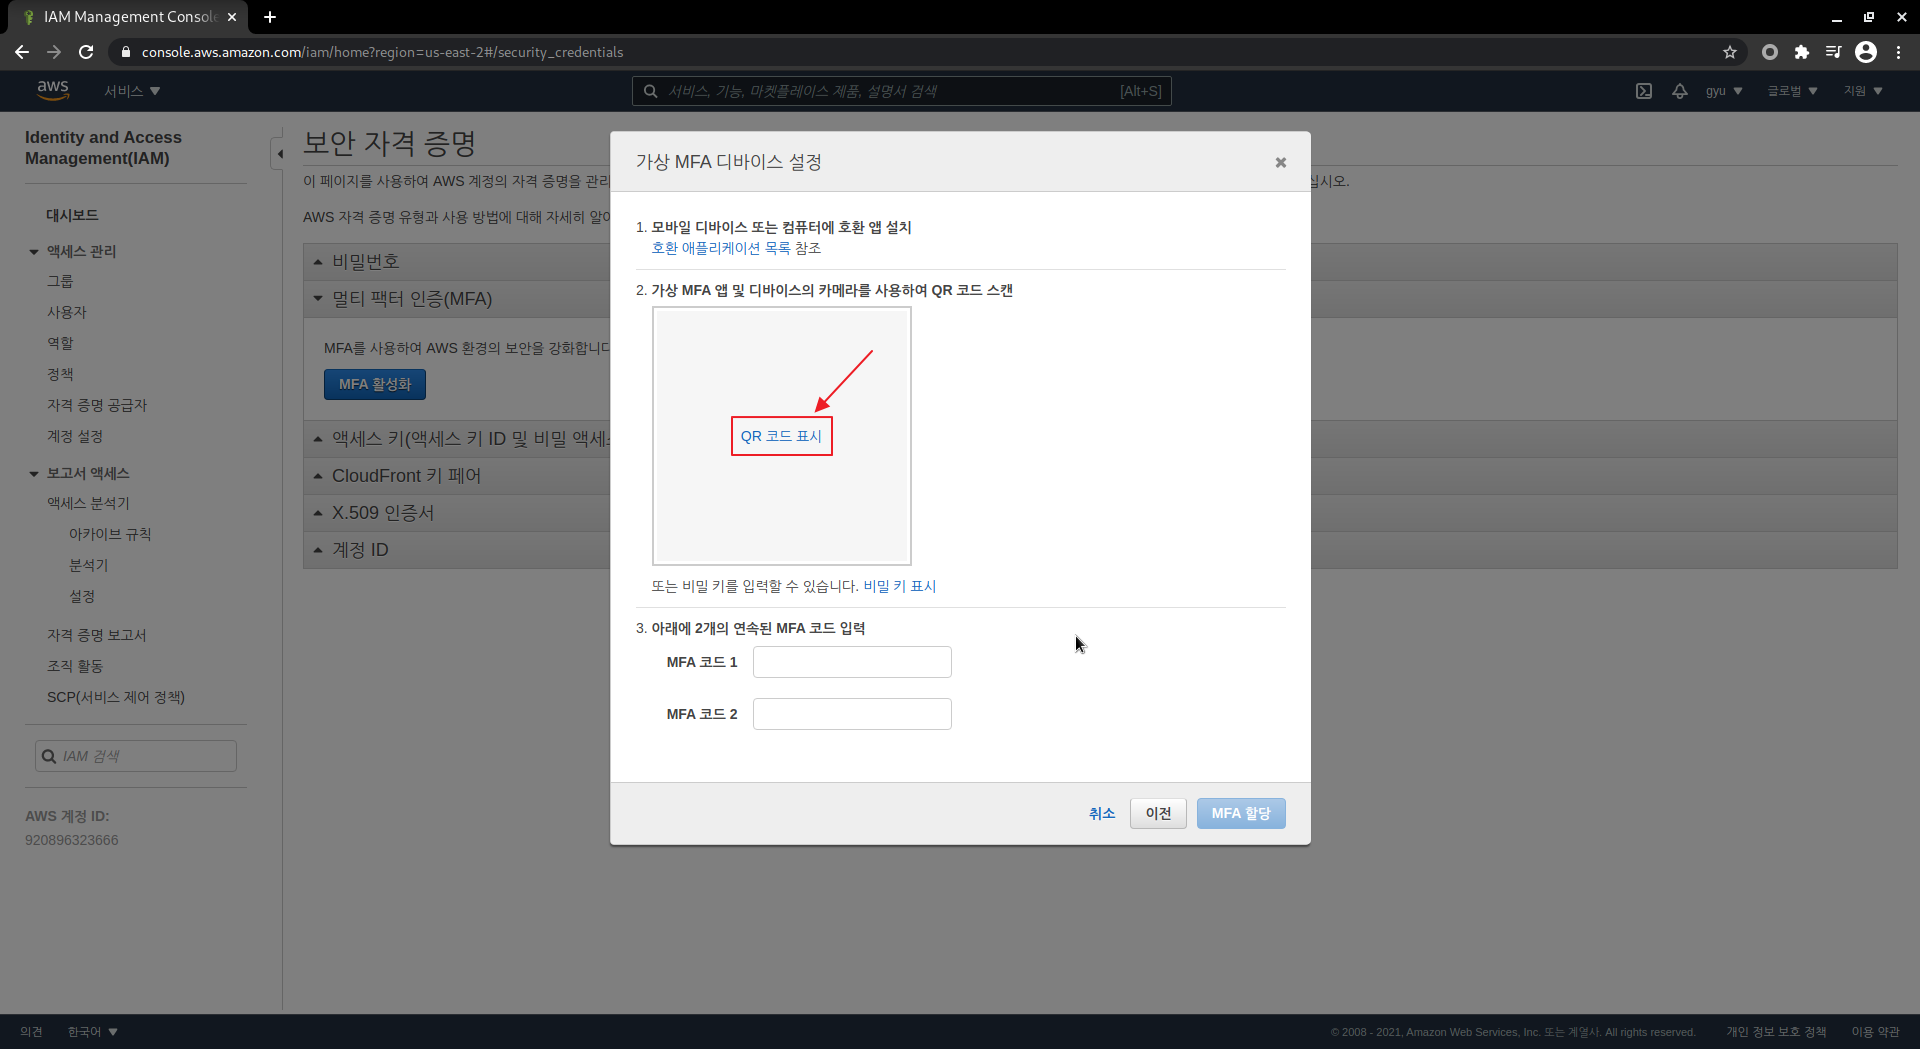
QR 코드로 인증하는 방식이 등장한다.
A method of authentication with a QR code appears.
[QR 코드 표시] 버튼을 누르면 QR 코드가 나온다.
When we press the [Show QR Code] button, a QR code appears.
다음 단계로 진행하기 전에 핸드폰에 OTP 어플리케이션을 설치해야 한다.
Before proceeding to the next step, we need to install the OTP application on your phone.
구글 Play 스토어에 OTP라고 검색하면 아래와 같은 아이콘 모양을 가진 어플리케이션이 나오고
설치하고 실행을 하면 아래와 같은 화면이 등장한다.
If we search for OTP in the Google Play Store, an application with the shape of the icon shown below appears,
and when we run it after installation, the following screen appears.
실행 후 하단에 있는 [시작하기] 버튼을 클릭하자.
After running, click the [Start] button at the bottom.

[QR 코드 스캔] 버튼을 눌러주자.
Click the [Scan QR Code] button.

① 핸드폰에 QR 코드를 찍는 화면이 나오게 되고 핸드폰으로 QR 코드를 찍는다.
① A screen to take a QR code appears on the mobile phone,
and take the QR code displayed on the site with the mobile phone.
② 찍고 나면 6자리의 인증 코드가 나온다.
첫 번째 나오는 인증 코드를 입력한 다음 일정한 시간이 지난 후 나오는 두 번째 인증 코드를 추가로 입력한다.
② After scanning the QR code with our mobile phone, we will see a 6-digit verification code.
Enter the first verification code and then additionally enter the second verification code
that appears after a certain period of time.
③ 입력을 완료하고 [MFA 할당] 버튼을 클릭하자.
③ Complete the input and click the [Assign MFA] button.

인증을 완료하면 아래와 같이 핸드폰이 인증 기기로 등록된 것을 확인할 수 있다.
After completing the authentication, we can check
that the mobile phone is registered as an authentication device as follows.

2단계 인증 설정이 완료되었는지 확인해보겠다.
Let's check if the 2-step verification setup is complete.
아이디를 클릭하고 [로그아웃] 버튼을 누르자.
Click the ID and click the [Logout] button.

화면에서 [콘솔에 로그인] 버튼을 클릭하고 로그인을 진행하자.
Click the [Sign in to the Console] button on the screen and log in.

위에서 했던 작업이므로 설명은 생략하고 로그인을 진행하자.
Since this is the job we did above, skip the explanation and log in.


OTP 인증 화면이다.
This is the OTP authentication screen.
① 핸드폰에 설치했던 OTP 어플리케이션을 실행한 후 나오는 여섯자리 코드를 입력하자.
① Enter the six-digit code that appears after running the OTP application installed on the mobile phone.
② [제출] 버튼을 선택하여 다음 화면으로 넘어가자.
② Let's go to the next screen by selecting the [Submit] button.

2단계 인증을 완료하고 로그인이 완료된 것을 확인할 수 있다.
We can confirm that the two-step verification is completed and login is completed.

'Web_Service > AWS' 카테고리의 다른 글
| AWS EC2 ELK의 설치 및 설정 (0) | 2021.02.02 |
|---|---|
| AWS EC2를 리눅스에서 ssh 연결하기 (0) | 2021.02.02 |
| EC2 인스턴스 설정 / EC2 Instance setting (0) | 2021.01.27 |
| 리젼과 가용영역 / Region and Availability Zone (0) | 2021.01.27 |
| 아마존 웹 서비스 회원가입 / How to Create an Amazon Web Services Account (0) | 2021.01.26 |