이번 포스팅에선 virtualbox에 centos 7을 설치하는 과정을 다뤄보겠다.
In this post, we will cover the process of installing centos 7 on virtualbox.
centos 7은 그래픽 지원이 안 된다는 점 참고하고 설치하도록 하자.
note that centos 7 does not support graphics.
필자는 그래픽 유저 인터페이스 환경보단 커맨드 라인 인터페이스가 더 익숙하다.
I'm more familiar with the command line interface than the graphical user interface environment.
아무튼 설치를 진행해보자.
Anyway, let's proceed with the installation.
centos 7을 그냥 centos라고 부르도록 하겠다.
Let's call centos 7 just centos, so let's go ahead and install it.
virtualbox를 켜고 바로 보이는 메인 화면에서 "새로 만들기" 항목을 선택한다.
Turn on the virtualbox and select the "New" item on the main screen that appears immediately.

자신이 설치할 centos에 "이름"을 만들어주자.
Let's create a "name" for the centos we are installing.
그리고 "머신 폴더"는 centos 환경을 저장하는 폴더의 위치를 정해주는 것인데 필자는 그냥 홈 디렉토리에 만들겠다.
And the "machine folder" is to specify the location of the folder that stores the centos environment.
I'll just create it in my home directory.
종류는 당연히 "리눅스" 운영체제이다.
Of course the "Linux" operating system.
버전 목록에는 centos가 없다. 레드햇 계열 리눅스이니 "Red Hat (64-bit)" 를 선택해주면 되겠다.
There is no centos in the version list. Since it is a Red Hat Linux, we can select "Red Hat (64-bit)".
설정을 끝마치고 나면 "다음" 항목을 클릭해서 넘어가자.
After completing the settings, click the "Next" item to continue.

다음은 메모리 크기 할당 항목이다.
The following are memory size allocation items.
그래픽 유저 인터페이스를 지원하지 않으니 굳이 메모리 크기가 클 필요는 없다.
It does not need a large memory size because it does not support a graphical user interface.
기본으로 놔두고 "다음" 항목을 클릭하자.
Leave it at the default and click on the "Next" item.
여러 패키지 설치와 프로그래밍을 해야하니 "지금 새 가상 하드 디스크 만들기" 를 선택하고 "만들기" 항목을 클릭하자.
Since we have to install and program several packages,
select "Create a new virtual hard disk now" and click the "Create" item.

다음 단계로 넘어가면 새 가상 하드디스크 파일 형식을 선택하는 문구가 나온다.
When we go to the next step, we will be prompted to choose a new virtual hard disk file format.
간단하게만 설명해보겠다.
Let me just briefly explain.
첫번째 VDI는 virtualbox에서만 사용하는 가상 디스크 파일 형식이다.
The first, VDI is a virtual disk file format used only by virtualbox.
다른 PC에서 사용하려면 virtualbox가 무조건 설치되어 있어야 한다.
To use on another PC, virtualbox must be installed on another PC.
두번째 VHD는 virtualbox와 마이크로소프트사의 Hyper-V, 시트릭스의 Xen에서 사용 가능한 가상 디스크
파일 형식이다.
The second, VHD is a virtual disk file format available for virtualbox, Microsoft Hyper-V, and Citrix Xen.
다른 PC에서 가상 하드디스크를 사용하려면 virtualbox 혹은 Hyper-V, Xen이 설치되어 있어야 한다.
To use a virtual hard disk on another PC, virtualbox, Hyper-V, or Xen must be installed on the other PC.
세번째 VMDK는 VMware Player와 연동이 가능한 가상 디스크 파일 형식이다.
The third, VMDK is a virtual disk file format available for VMware Player.
다른 PC에서 가상 하드디스크를 사용하려면 virtualbox 혹은 VMware Player가 설치되어 있어야 한다.
To use a virtual hard disk on another PC, virtualbox or VMware Player must be installed on the other PC.
사용하고 싶은 가상 하드디스크 형식을 사용하면 되지만 필자는 현재 사용중인 노트북에서만 쓸 예정이므로
VDI를 선택하겠다.
You can use the virtual hard disk format you want to use, but I'm going to use it only on my laptop,
so I'll choose VDI.

다음은 하드 디스크를 동적으로 할당할 것인지 고정 크기로 사용할 것인지 설정하는 항목이다.
The following is an item to set whether to allocate the hard disk dynamically or use a fixed size.
동적 할당은 쓰는 대로 디스크 용량을 늘리는 것이고 고정 할당은 고정해놓고 사용하는 것이다.
Dynamic allocation increases disk capacity as additional capacity is used, and fixed allocation uses fixed capacity.
밑의 설명대로 고정 할당은 디스크의 정해진 범위 내에선 속도가 빠르나 용량에 한계가 있는 방식이다.
As described below, the fixed allocation is a method in which the speed is fast within a predetermined range
of the disk, but the capacity is limited.
동적 할당은 디스크 용량 면에서 유동적이나 많은 패키지 설치로 인해 늘어난 용량은 삭제 후 사용량이 줄어도 그 용량이 다시 줄진 않는다.
Dynamic allocation is flexible in terms of disk capacity,
but the increased capacity due to the installation of a large number of packages does not decrease again even
after usage is reduced after deletion.
서로 장단점이 있다고 봐야할 것 같다.
I think that there are advantages and disadvantages to each other.
필자는 "동적 할당" 을 선택하고 다음 단계를 진행해보도록 하겠다.
I will select "dynamic allocation" and proceed to the next step.

디스크 파일의 이름을 정하고 하드디스크 크기를 정하는 항목이 나온다.
There is an item to name the disk file and determine the size of the hard disk.
크기에 따라 여러분의 메인 컴퓨터 디스크를 할당하는 것이다.
It allocates our main computer disk according to its size.
크기가 적당한 것 같으니 기본으로 놓고 진행해보도록 하겠다.
It seems to be the right size, so let's proceed with the default.

이제 기본적인 설치는 완료되었다.
The basic installation is now complete.
설치한 가상 머신 옆에 모자 모양이 보일 것이다. 레드햇 리눅스의 아이콘이다.
We will see a hat shape on the left side of the installed virtual machine. It is an icon of Red Hat Linux.
하지만 이전 포스팅에서 다운로드 받은 centos ISO 이미지 파일은 아직 사용하지 않았다.
However, the centos ISO image file downloaded in the previous post has not been used yet.
이제 가상 메모리와 가상 디스크를 할당했으니 본격적으로 설치를 진행해보도록 하자.
Now that we have allocated virtual memory and virtual disks, let's proceed with the installation.
설치를 위해 자신이 설치한 centos를 더블클릭하자.
To install, double-click on the centos we installed.

그러면 파일을 선택하여 설치를 진행할 수 있는 화면이 나온다.
The screen to proceed with installation by selecting the file appears.
필자는 이전에 한 번 설치해봤기에 자동으로 나오지만 보통의 경우라면 아마 아무것도 안 나올 것이다.
I've installed it once, so it will automatically come up, but in the normal case, it will probably show nothing.
나온다면 바로 "시작" 버튼을 누르고 아무것도 나오지 않는다면 "디렉토리 모양"을 클릭하자.
Click the "Start" button if it comes up, but click on the "directory shape' if nothing comes up.

디렉토리 모양을 클릭하고 나면 파일을 고르는 항목이 나온다.
After clicking on the directory shape, we will be presented with an entry to choose a file.
우리는 이미 ISO 파일을 다운로드 받았으니 바로 "추가" 버튼을 눌러 centos ISO 파일을 선택해주도록 하자.
We have already downloaded the ISO file, so click the "Add" button and select the centos ISO file.

파일이 저장된 위치로 이동하여 centos 파일을 선택해주고 "열기" 버튼을 눌러주자.
Go to the location where the file is saved, select the centos file and click the "Open" button.

항목을 열고나면 최종 이미지 파일 등록을 할 수 있는 항목이 나온다.
After opening the item, an item to register the final image file appears.
"선택" 을 눌러 우리가 설치한 centos 디스크에 ISO 파일을 구동시켜보자.
Click "Select" to run the ISO file on the centos disk we installed.

화면에 바로 centos 7 설치 문구가 나온다.
The installation text of centos 7 appears on the screen.
"Install CentOS 7" 에서 "Enter" 키를 눌러 설치를 진행하자.
Press "Enter" key in "Install CentOS 7" to proceed with the installation.

다음은 언어 설정이다.
Next is the language setting.
그냥 설치할 때 쓸 언어를 물어보는 것이다. centos 내에선 한글 입,출력은 안 된다.
Just ask for the language to use when installing. Hangul input/output is not allowed in centos.
필자는 한국인이므로 "한국어"를 선택하겠다.
Since I am Korean, I will choose "Korean".

여기 "설치 대상"에 빨간 색 글씨로 설정해야 한다고 나올 것이다.
Here the "Installation Target" is marked in red and we will be asked to set it.
필자는 스크린샷을 깜빡해 설정을 하고 스크린샷을 남겼다.
I forgot the screenshot, set it up, and left the screenshot.
"설치 대상" 이라고 써 있는 부분을 클릭하자.
Click on the section that says "Installation Target".

저장 장치 설정인데 디스크를 추가하지 않고 바로 "완료" 버튼을 누르자.
It's a storage setting, but without adding a disk, just hit the "Done" button.

다시 이전 화면으로 돌아오면 "설치 시작" 버튼을 눌러 설치를 이어서 진행하자.
When we return to the previous screen, click the "Start Installation" button to continue the installation.

다음은 "ROOT 암호" 설정이다.
Next, let's set the "ROOT password"
일반 사용자 생성은 root 권한으로도 충분히 생성 가능하니 일단 root 암호만 설정해주자.
Creating a normal user can be done with root privileges, so let's set only the root password.


암호 설정을 완료하고 설치가 완료되면 재부팅하라는 메세지가 출력된다.
When the password is set and the installation is completed, a message to reboot is displayed.
"재부팅" 버튼을 눌러 시스템을 재부팅해주자.
Click the "Reboot" button to reboot the system.

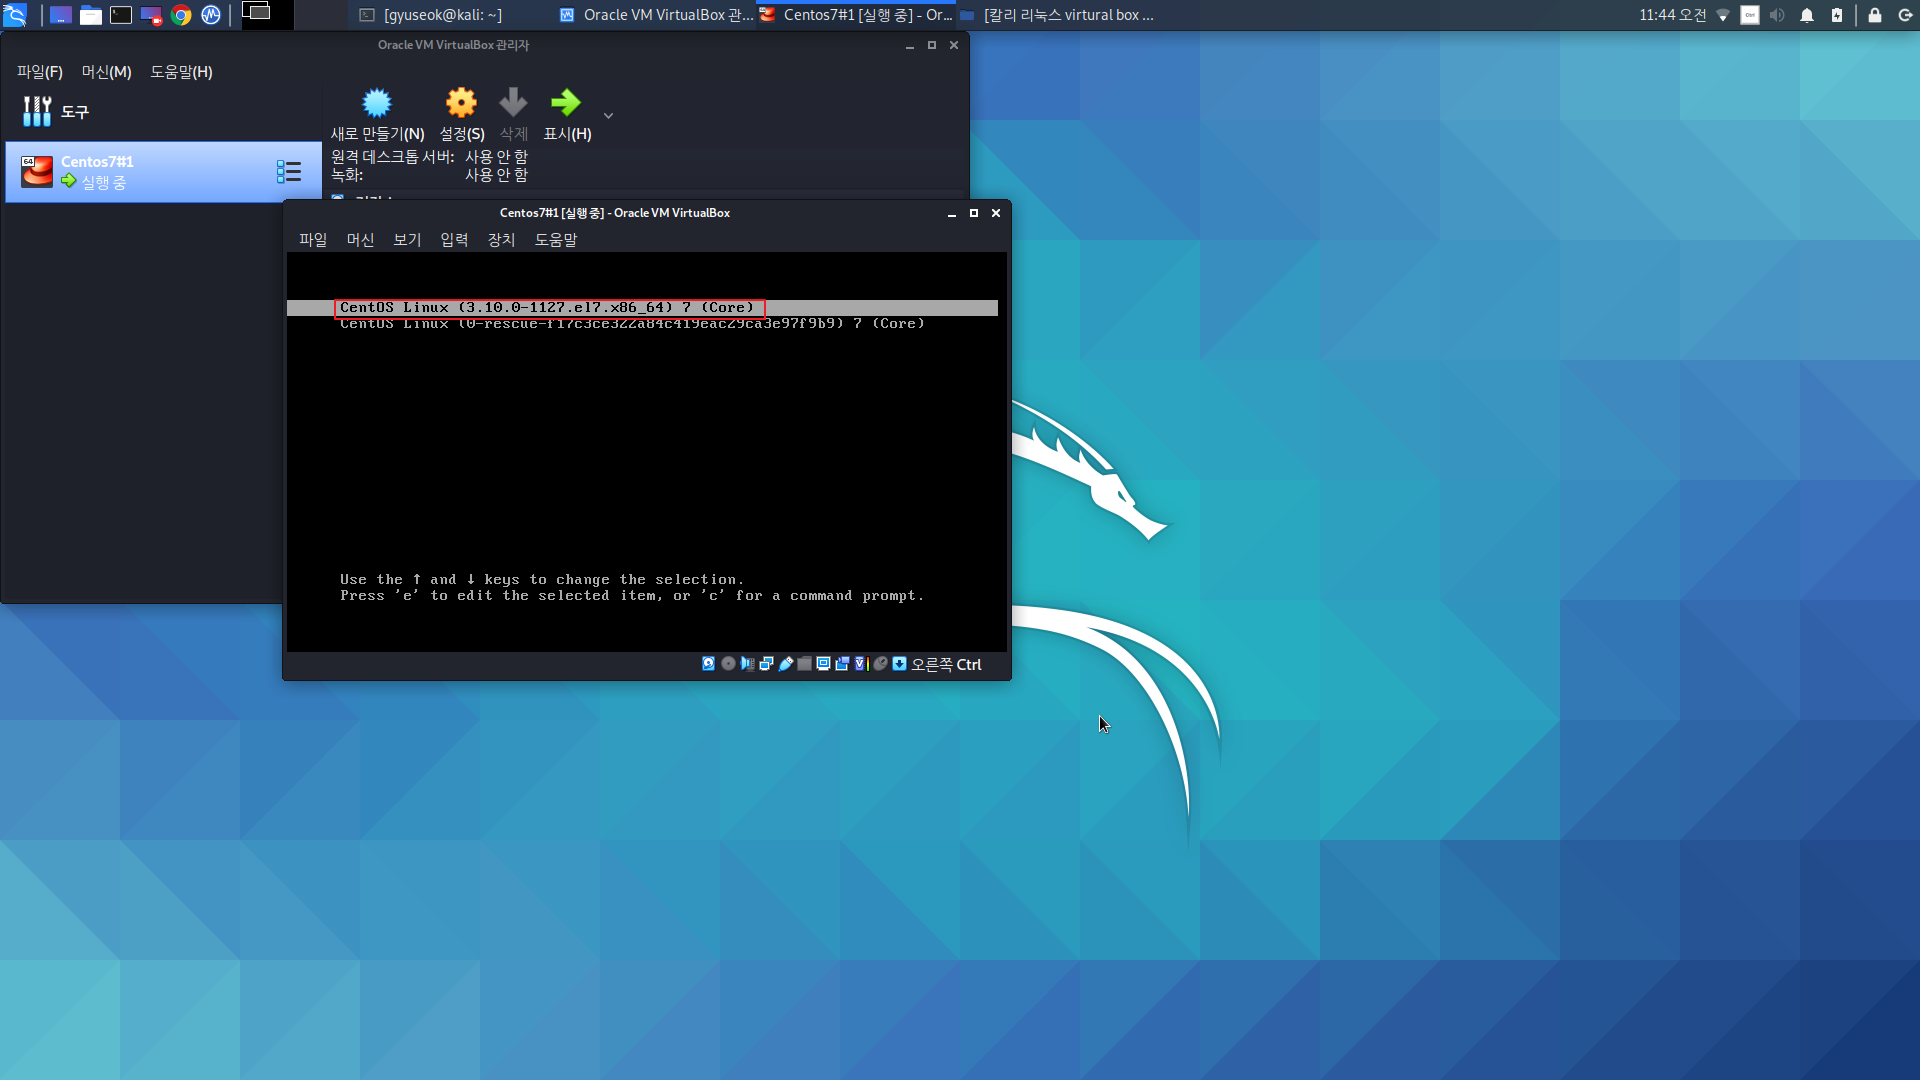
재부팅을 해주면 시스템 선택화면이 나오는데 기본 모드로 접속할 것이니 가만히 놔두거나 "Enter"키를 눌러
접속해보자.
After rebooting, the system mode selection screen will appear,
and we will be connected to the default mode so leave it alone or press the "Enter" key to connect.
여기서 많은 사람들이 당황하는 부분이 centos 7은 그래픽 유저 인터페이스가 아니라 커맨드 라인 인터페이스이기에
화면 클릭시 마우스가 사라지는 것을 볼 수 있다.
The embarrassment of many people here is that centos 7 is not a graphical user interface,
but a command line interface, so we can see that the mouse disappears when the screen is clicked.
당황하지 말고 마우스를 표시하거나 빠져나오게 하고 싶다면 "Ctrl + Alt" 를 누르거나
"Ctrl + Alt + Delete" 를 눌러주자.
If we don't want to panic and want the mouse to appear, press "Ctrl + Alt" or "Ctrl + Alt + Delete".
이제 접속을 해보자.
Now let's connect.
"localhost login" 오른쪽에 "root"라고 입력하고 "Password" 오른쪽엔 아까 여러분이 입력했던 비밀번호를
입력하면 된다.
Enter "root" to the right of "localhost login" and the password we entered earlier to the right of "Password".

접속이 잘 된 것을 확인할 수 있다.
We can see that the connection was successful.

다음 포스팅에선 virtualbox에 무선네트워크 설정을 하고 centos에도 설정한 무선 네트워크를 적용하는 내용을
다뤄보도록 하겠다.
In the next post, I will cover the contents of setting up a wireless network in a virtualbox and
applying the wireless network set in centos.
'Linux > Kali_Linux' 카테고리의 다른 글
| virtualbox 네트워크 설정, centos 네트워크 / Virtualbox network setup, centos network setup (0) | 2020.07.06 |
|---|---|
| 칼리 리눅스 virtual box 설치 및 Centos 7 설치 ① / Install virtual box and install Centos 7 on Kali Linux ① (0) | 2020.07.02 |
| 칼리 리눅스 크롬 설치 / Install Chrome on Kali Linux (0) | 2020.06.30 |
| 칼리 리눅스 한글 설정 / Kali Linux Hangul Configuration (0) | 2020.06.30 |
| 칼리 리눅스 설치 과정 ② / Kali Linux installation process ② (0) | 2020.06.28 |